Friday, May 9, 2014

Datura refashion / wearable muslin

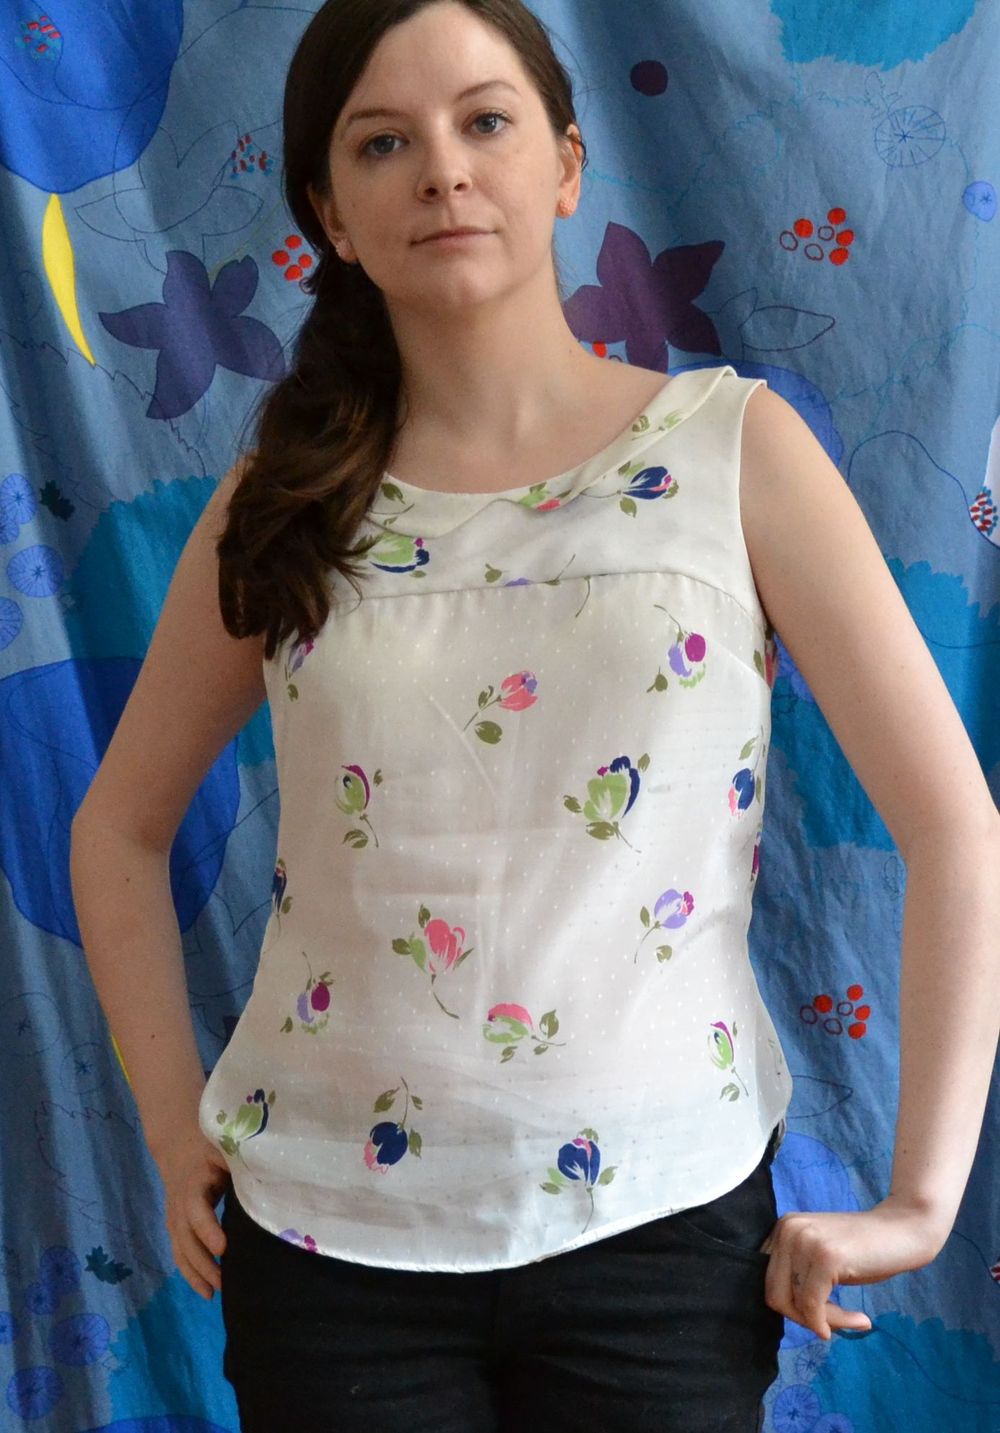
front

Lately most of my sewing projects have been failures, and I really can't gather the will to blog about them. This one almost ended up in the failure pile too, but a couple of rough on the fly fixes and I ended up with a top I'll actually wear! 
This is the Datura blouse from Deer and Doe Patterns. You've likely seen this one around! I'm pretty broke so I consider indie pattern purchases a bit of a luxury. It took me a long time to cave and finally buy this pattern. I already have three more planned so I think it will be worth it!

Pattern Notes:

I started  with the size 38. I know doe and deer patterns are sized for a c cup bust, which obviously is not me! This is actually my second try with a D&D pattern. I have a failed Belladone stashed away, waiting for me to deal with it sometime. For the Belladone I did a small bust adjustment, but for some reason this time I skipped it. 

My first hurdle with the pattern came with sewing the yoke together. I could not for the life figure it out. I spent quite some time searching online for someone to explain it, and that just turned up either people linking to a dead french link explaining it, or just commenting on how ingenious the construction is. Ha! I felt like a bit of an idiot. 

Anyways: you turn the front yoke piece so that it is right side out, then place it inside the back yoke piece! ugh. For some reason the wording in the pattern completely threw me. I might try to make a mini photo tutorial to replace the dead french one in case anyone else is out there on the internet confused as hell by this pattern!

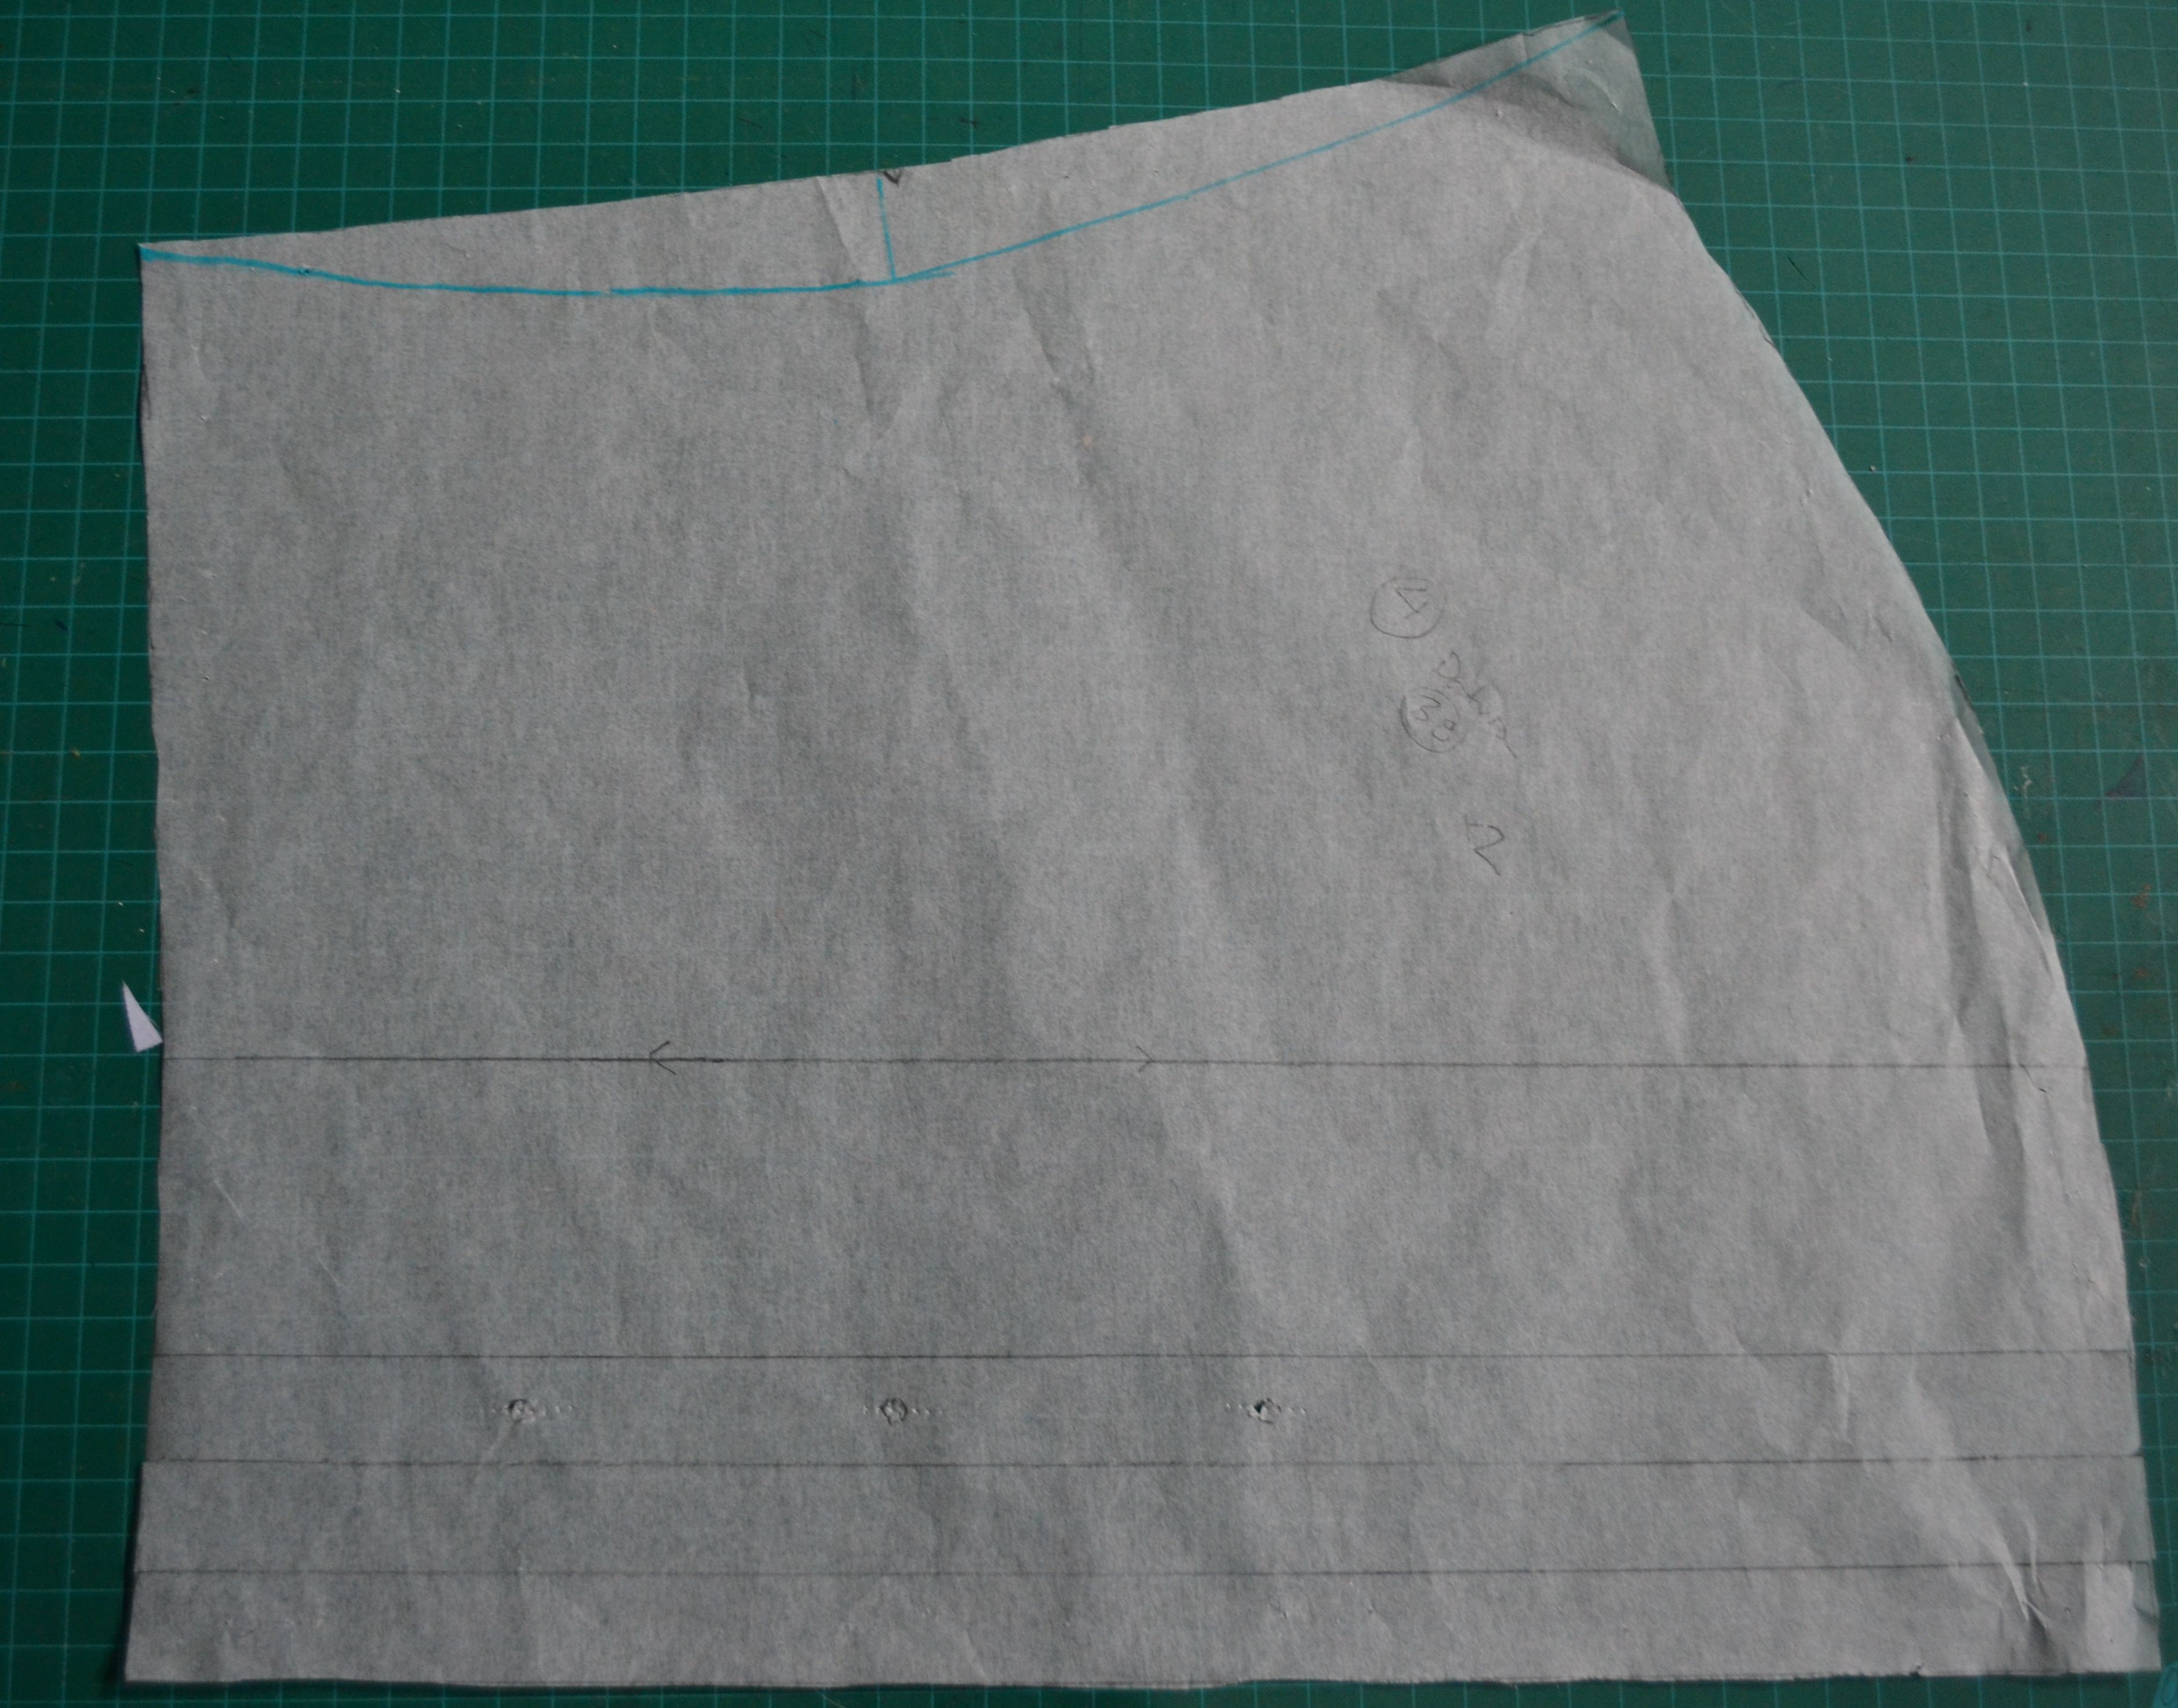
Once the yoke was figured out I tried my WIP and the fit was pretty bad on me. The bust dart was quite a bit too low and the whole thing overwhelmed my small frame. In progress fixes I did:
1) take up the straps 3/4"
2) drawing a waist shape into the body like so:


Fabric notes:
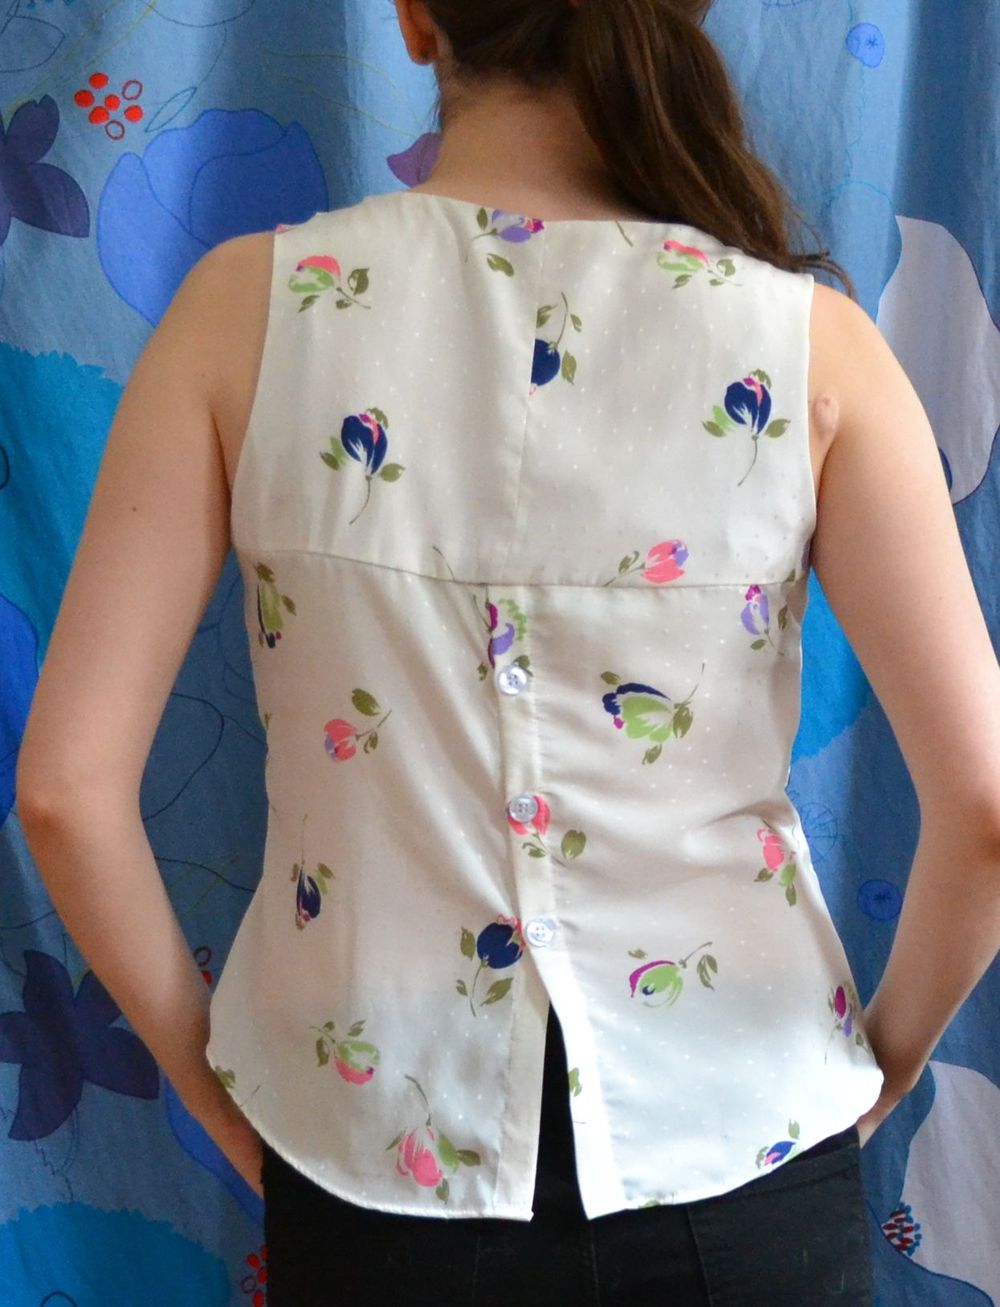
datura back

This is actually a refashion from an old unflattering dress I was holding on to because I liked the print. It's a light weight poly and was a little tricky to work with. I'm a still a novice when it comes to slippery fabrics!

I've changed my stash diet rules a bit to deal with my particular situation, which includes lots of potential refashions. Any one finished refashion project (even if it used more than one old piece) counts as one complete "stash" fabric. So not great for counting used up yardage but what I need to get my sewing corner under control!

...Actually I'm just off to visit fabricland on this lovely (warm! sunny!) spring day, and likely use up my whole earned fabric allowance of three pieces!

Wednesday, April 16, 2014

An actual wearable sweater.


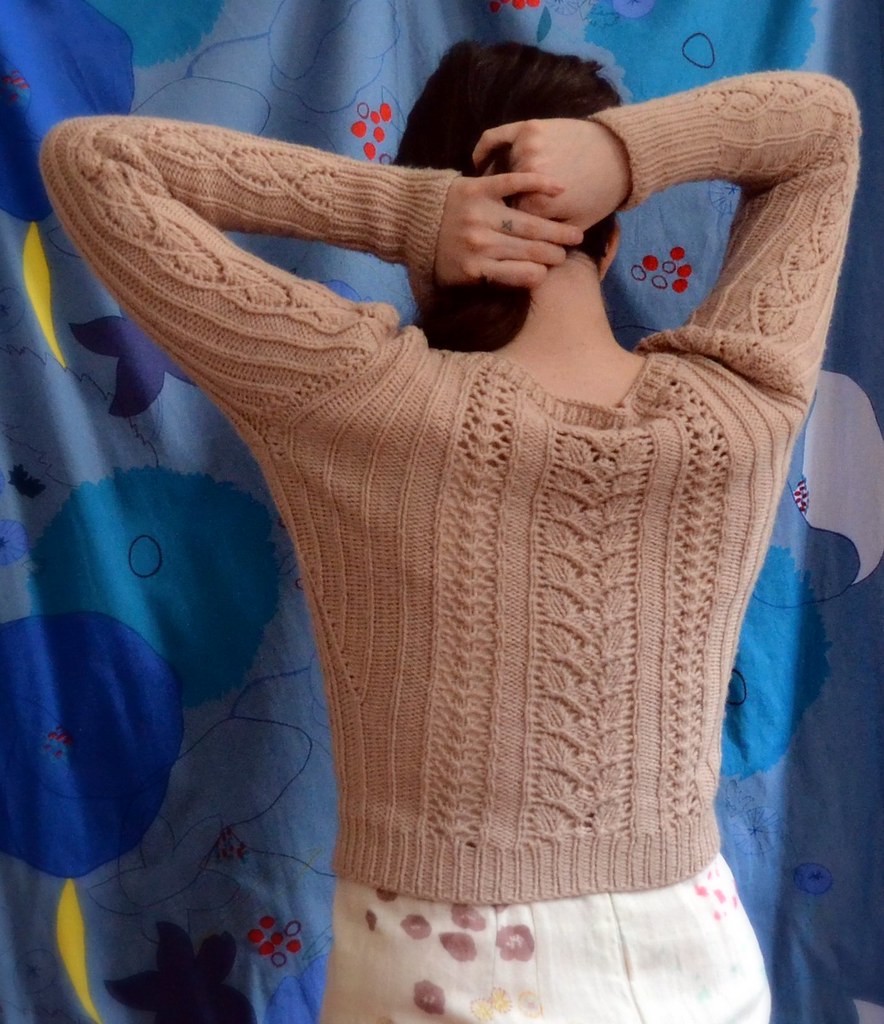
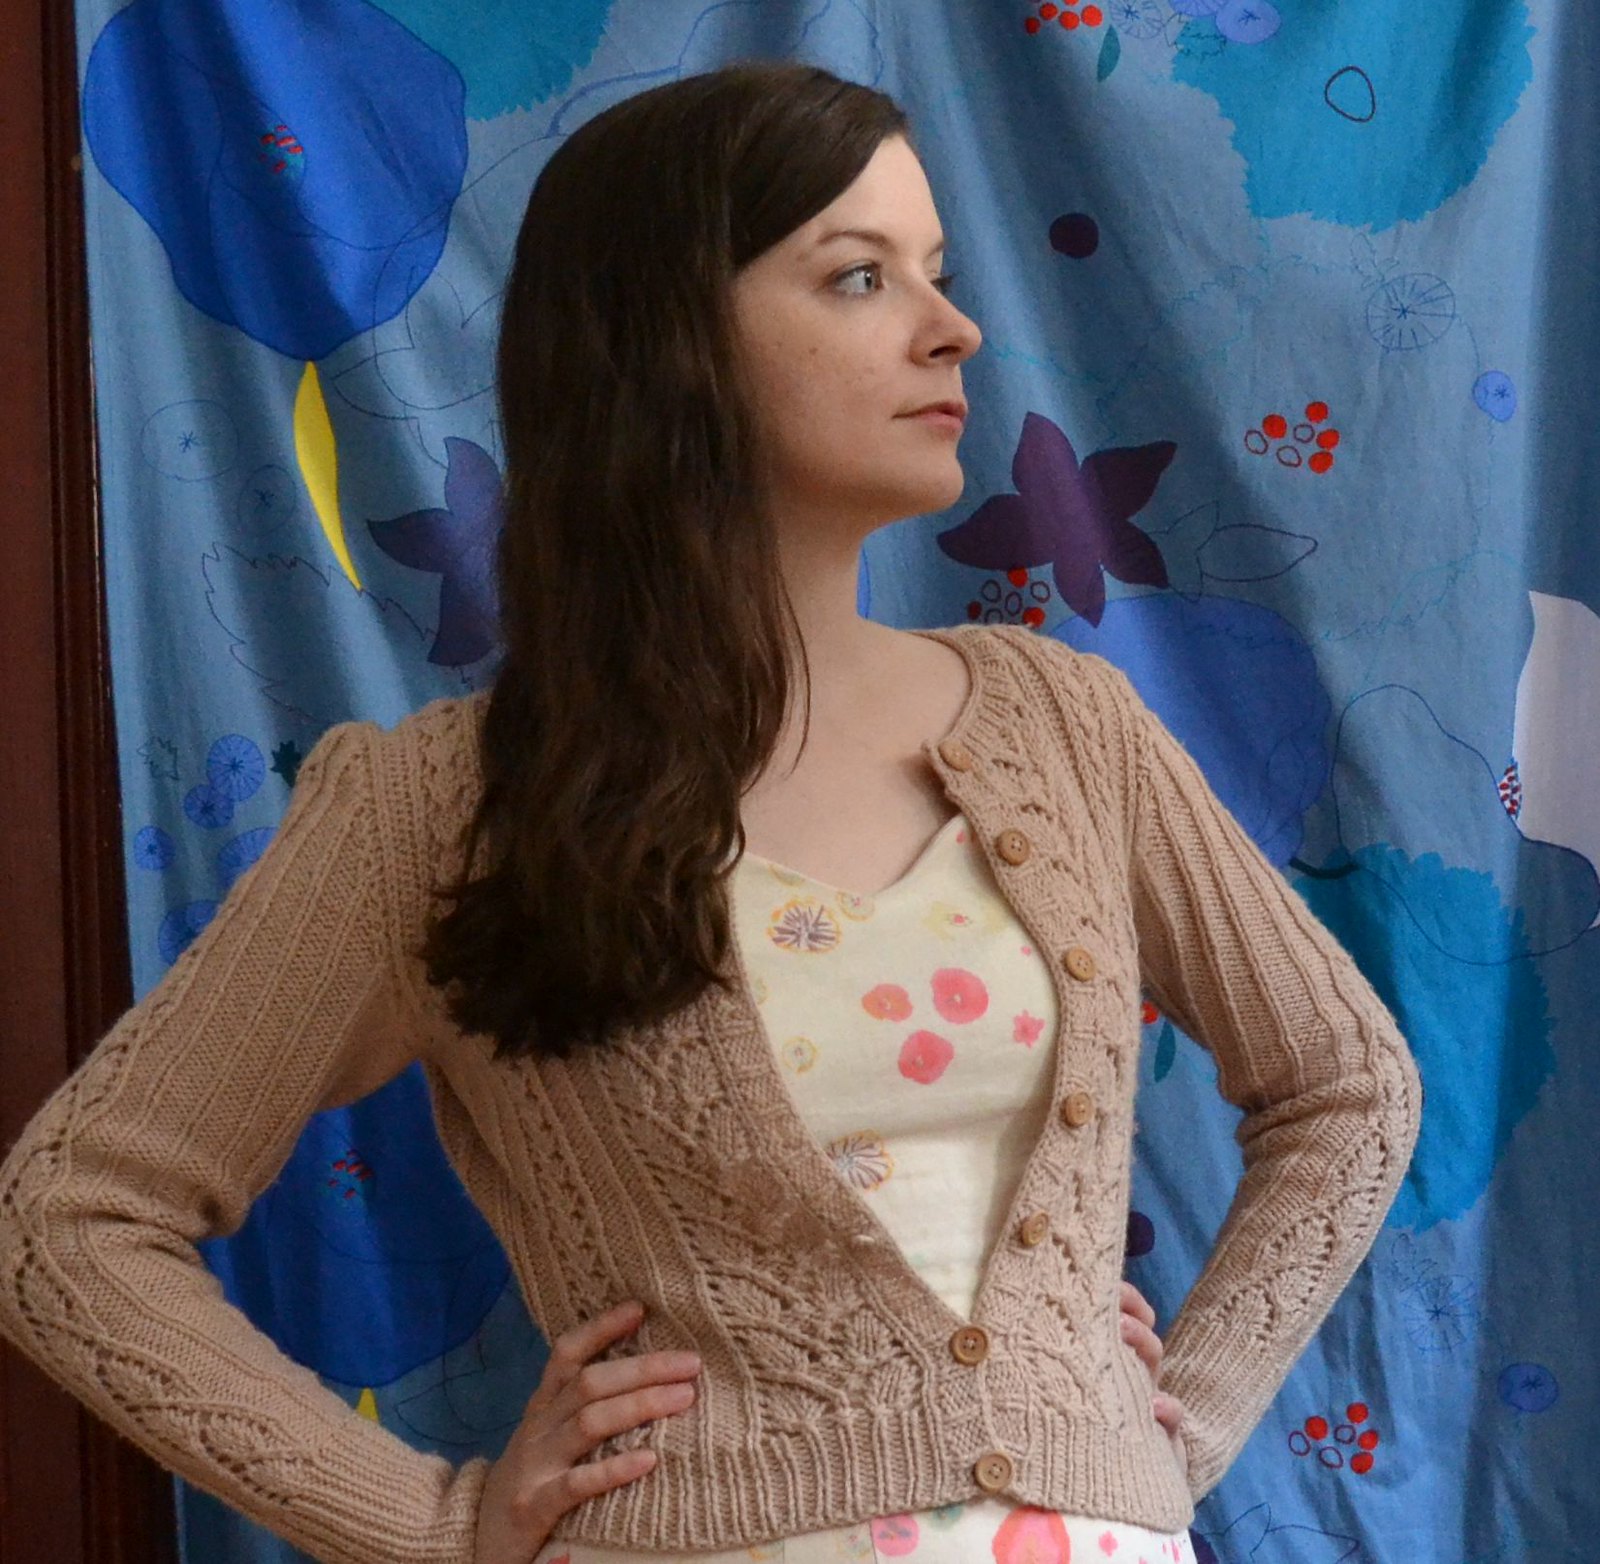
Even though I've been knitting for quite a few years I've never actually managed to complete a sweater that ends up being wearable! This one still has its flaws (if anyone has an easy to understand faq on short rows / how to make them invisible I would love it if you passed it on to me. I watched and read many how-tos and kind of got it, but still made mistakes / lack confidence). 

The pattern is the Agatha cardigan from Andi Satterlund, and I imagine a lot of you have seen it before as its pretty popular in our corner of the internet. For good reason I think, it's pretty cute. I like the high-waisted style becaue it complements vintage looks but also the design is nice and casual which is good for counter-balancing some of my dresser makes (like my sultry sheath).I probably should have made it in a medium, as it pulls at the button band pretty badly. But what the hell, still very happy with it.


A quick word on the yarn: I used cascades 220 like the pattern called for, and the sweater has already started felting and pilling even though I've only worn it 6 or so times. I don't think it happened during blocking because it looked fine after that. Any insight to what's going on? This sort of thing happen with cascades yarn maybe?

Thanks for checking out my post, hopefully I'll be back next week with some recent spring makes!
It's spring dammit. Stop it with the snow Toronto.

Wednesday, February 19, 2014

Gingham Negroni for Joshua


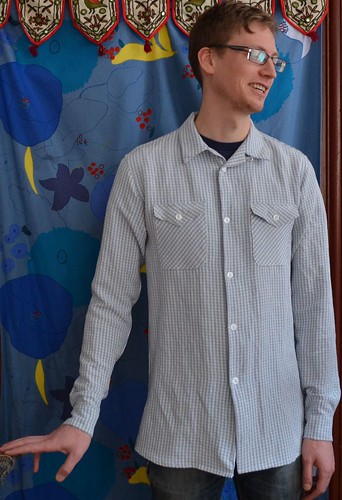
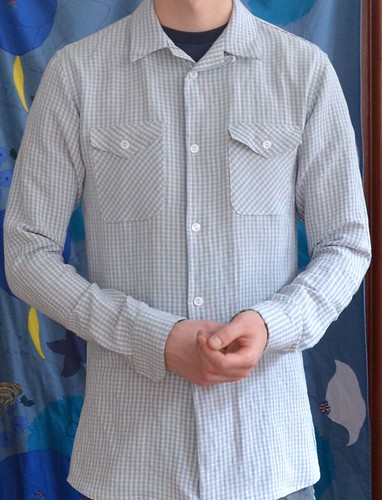
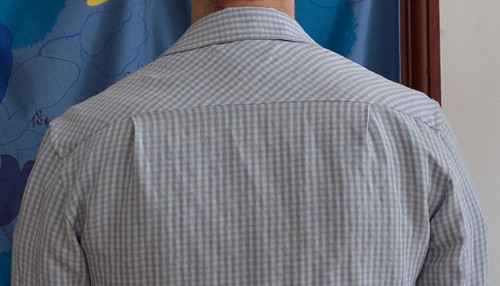
Ok,  so crafting resolution #2 attempt 1! I've been wanting to make something for my boyfriend Josh for years now, and finally got around to it. I'm pretty pleased with it for a first try, though there are definitely some things that I'll change for the next try (primarily the length of the shirt body). Also I learned that not only am I bad at taking self timer shots of myself, but I generally suck at photography all around. For most of these pictures I stood way to close to Josh and since he's a good foot taller than me, they all ended up being lovely shots of up his nose. Sorry babe! I also didn't take that many shots since I felt bad about making him model (for no real reason since he was great about it) so had very few shots to pull from. New mini crafting resolution: become better at photography.


gingham negroni 01


Pattern notes:

This is the Negroni pattern from Colette Patterns. I got this back in 2011, so it's been in my stash for a while. I didn't realize that it had a camp collar until I started making it! I think it works but I also want to make Josh a more traditional dress shirt as well, so if anyone has any suggestions let me know!

I used the medium for the most parts but lengthened the body to the xl. I did this because I was comparing the length to that of a shirt my boyfriend said was a good length on him but realized after it was done that long dress shirt = meant to be tucked, versus the short more casual style of the negroni. So that was one new lesson. I want to go back and shorten this shirt at some point.

The only other change I did was slashing and overlapping the sleeve at the midpoint to make it narrower, which was the only change Josh asked for from the muslin. I wasn't really sure at first how to go about doing that while still keeping the cuff and shoulder seams the same size since he was happy with them. After searching the internet the best I could come up with was the inverse of this technique (thanks internet!). I then trued the pattern and proceeded on my way. It seems to have worked but yeah, lots of guesswork in that pattern manipulation theory.


Sewing notes:

Lots of new techniques for me here but not many changes from the pattern. The only major failure was my flat felled shoulder seams. When it came time to press the shoulder seams to the body to be sewn down I messed up the previous pressed fold, and could not get it back as neatly because it was already sewn on. Next time I'm just going to finger press at this point. I think maybe I lack refined pressing skills!


Plackets! Kind of fun, kind of stressful. I bought an edge stitch foot after this project. 


Fabric notes:

I've decided that items sewn for other people are exempt from my stash diet rules, and this was not a stash piece so it doesn't count towards my stash total. However of the 3 yards I bought for this project I ended up with about 3/4 of a yard left (single layer cutting!) so now that leftover counts as 'stash'. 

Been really enjoying watching Project Sewn unfold, and have a couple ideas about the next themes so might submit to the sew along if I can get organized in time!

Friday, February 14, 2014

Lately - Stash busting with mixed results

Deena


  1. A failed wearable muslin of the Grainline studio Tiny Pocket Tee for Stash diet #2. Is the pocket supposed to be kind of slanted at the top? Really hard to tell in that photo, though I expect no...
  2. New Cat Lady poster from Bellwoods brewery. Pretty great, but makes me want fancy beer whenever I look at it!
  3. Stash diet #3. A small success. To get through my stash will require some pretty unexciting projects, which I think is part of the problem. Bought this upholstery weight fabric about three years ago from etsy?


Wednesday, February 5, 2014

Project Complete: Knit for Victory tam

victory 1940s tam 03

Well I finished it by the deadline, but only managed to take pictures today. This is my Victory by Tasha Moss, which I knit as part of the Knit for Victory! KAL. Tasha's blog by gum by golly is one I've been following for a few years now, and a big part of why I now love fair isle and vintage knitting patterns. When she released her first pattern recently I felt like I had to give it a try!

victory 1940s tam


This was my first time knitting with fingering weight yarn actually. I found it made the fair isle a little more difficult, although I didn't help myself by using some very slippy alpaca wool for two of my colour choices. I used sisu by sandnesGarn fingering weight wool/nylon blend and mini alpakka by sandesGarn, mostly due to neither line having all the colours I wanted. I like the mix for the most part, except maybe in the very middle because that's the only place where it's obvious I used two types of yarn. I also reduced the number of colours to four because I didn't like my first mix, and ripped half way through. 

Maybe because of the drape of the yarn it really didn't hold the tam shape long after blocking. I like the more relaxed look though, more vintage inspired then a straight up vintage look, which is more my style anyway.

I've been killing myself over patch pockets and fiddly finishes on a Negroni shirt for my boyfriend, so hopefully I'll stay motivated and have another post up here soon!


Monday, January 27, 2014

Nani Iro Pastille Dress

nani iro print Pastille


So this is my first completed project of 2014! I've committed to the Stash Diet: 2014 because my fabric buying has been outpacing my project making since I was about 15 and first started going fabric shopping. It's pretty bad. For one thing, I have quite a few pieces that are no longer really my style, so will need to be given up or used in a creative fashion. I think the best (or worst) is a fleece covered with large eyed fawns and berries... I think it might be too saccharine for even a one year old. Oh high school Laurel, wtf.


But not so this fabric. This was pretty much my favourite stash piece, and I wanted to make sure I made something with it while I was still in love.


Nani Iro print Deena bed
Also functions as a fancy Deena bed.


Fabric notes:

This is a Nani Iro double gauze cotton that I've been holding on to for the last two years. It's incredibly soft and the green is a lovely vibrant shade. I think the name of the print was Gentle Cooing, which is kind of amusing. When I want to buy a print I can't really afford I only buy 1 1/2 yards as I know that's the minimum I can squeeze a garment out of. There was pretty much no fabric left as scraps, but it worked!


nani iro print pastille back


Pattern notes:

This the Pastille dress from the Colette sewing handbook which I've owned for a couple years now, it's only my second pattern made from the book, so I guess it counts as stash... using?
I had to make quite a few pattern alterations to make it work but that seems standard from looking at other peoples versions.
I did:
 A small bust adjustment.
Removed 1" from upper back as you would a swayback.
 Lengthened darts - front waist 1", back waist 2", back neckline 1"
removed 1/2 fullness from front and back cap sleeves

I also used a dirndl skirt instead of the straight skirt, but that was due to the fact that I noticed I prefer wearing dirndl skirts more. I do really like the tucks on the original skirt though, so maybe I'll make this again some time.


I'm almost done my Victory beret, so for once I might actually finish a knit/sew-along by the deadline! If so I may have two posts in one week (!?).

Thanks for checking out my project,

Laurel 

Thursday, January 2, 2014

The year ahead: crafting goals for 2014


1 Sew a tailored jacket. I've been signed up for Gertie's starlet suit jacket course on craftsy.com (unfortunately no longer for sale) for a few years now. It's time to actually complete this course! I really want to learn to be better at making jackets. I've made a few from Burda and the big 4, but none have ever really turned out that well (and hence ever made it onto the blog). There are a few stashed vintage jacket patterns and burdastyle magazine patterns that I would love to make up, and I'm hoping this course will give me the confidence to attempt more jacket sewing. First jacket is by Dear Creatures the second is Simplicity 8453 from the 1950s.

2 Sew for other people. I've gotten pretty good at fitting patterns to my body, now it's time to branch out and learn how to fit on others. I have a first project already planned for this, a Negroni dress shirt for my boyfriend. I've had this pattern in my stash since some time in 2011? Too long. This project will be extra satisfying as my boyfriend has a hard to fit body type and a nearly impossible time finding shirts that fit right (medium in width extra large in length).


3 Sew more from my stash. I've got quite the horde going on, to the point where I feel a bit like Smaug in the Hobbit (excuse me while I nerd out a bit), surrounded by my treasure trove. It's messy. I have fabrics that have been in my stash for over a decade (!). I live in a one bedroom apartment with my boyfriend. That shelf in the picture is in our living room (and is only a fraction of my collection). I think I'm going to follow along with the stash diet: 2014. All fabrics currently in my collection as of the beginning of January count as "stash". I will be allowed to buy notions / linings etc. as needed, and new fabric for every 3rd project if I want to. If I special order fabric online, I can buy an accompanying piece of fabric. If I go on vacation to somewhere with a nice fabric shop I can buy a few pieces of fabric (although not a huge problem, when I went to New York this past summer I didn't even make it to Mood. I love fabric but I love the Met more [I love the Met a lot]).

4 Do more remakes, and finish UFOs. Related to the goal above. One large part of my sewing mess or more charitably 'stash' is things that I want to refashion or have not finished. Hopefully this is the year I can finally get around to it.


5 And finally, learn to knit from vintage patterns. 2013 was the year I finally learned Fair Isle (from this amazing course even though my vest turned out too short and needs to have the ribbing lengthened).This year I want to learn to knit from vintage patterns. I have my eye on this cardigan, and a copy of Vintage Design Workshop, which so far looks awesome and has the level of hand-holding I feel I need for this undertaking.

If I somehow manage to complete all these goals I will consider 2014 a year well spent. Here's hoping.